in , , ,

Quick And Easy Ways In Resetting An Amana Air Conditioner

Quick And Easy Ways In Resetting An Amana Air Conditioner

When it comes to enjoying a comfortable and cool home environment, your Amana air conditioner plays a vital role. However, there may be times when you need to reset your Amana air conditioner. Don’t worry, though, as we have conducted thorough research to provide you with a step-by-step guide on how to reset your Amana air conditioner.

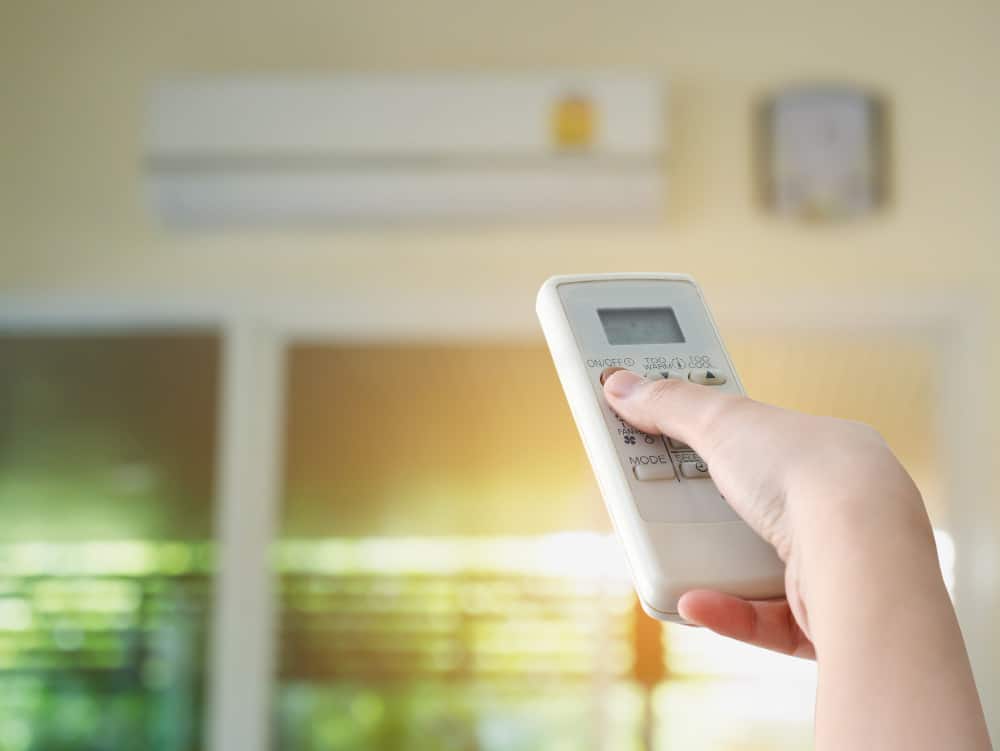
Resetting your Amana air conditioner typically involves restoring it to its default settings. To begin the reset process, follow these simple steps:

  1. Turn on your Amana air conditioner.
  2. Locate the reset button and press and hold it for approximately 5 seconds.
  3. Release the reset button, then press and hold it again for another 5 seconds.
  4. Wait for the unit to complete the resetting process.
  5. Once the resetting is finished, you will notice a red light flashing or blinking, indicating a successful reset.

In this article, we will not only explain how to reset your Amana PTAC unit and furnace unit but also provide troubleshooting tips for your Amana AC unit.

Resetting Your Amana PTAC Unit

To reset your Amana PTAC (Package Terminal Air Conditioner) unit, follow the detailed step-by-step procedure below:

  1. Ensure that the unit is turned on.
  2. Lift the plastic cover of the unit to access the control panel.
  3. Set the main control to the “OFF” position.
  4. Locate the “COOL” and “HEAT” buttons on the control panel.
  5. Simultaneously press and hold both the “COOL” and “HEAT” buttons, then turn the main control to the “ON” position.
  6. Once you have completed these steps, a red light will indicate that the PTAC unit has been successfully reset.

Performing A Self-Diagnostic Test On Your Amana PTAC Unit

To conduct a self-diagnostic test on your Amana PTAC unit, follow these steps:

  1. Look for the “UP” and “DOWN” arrow keys on the control panel.
  2. Press and hold both arrow keys simultaneously while tapping the “COOL” button twice.
  3. Wait for a few moments for the display panel to change.
  4. Allow the unit to complete the system update.
  5. Once the updating process is complete, you will see a red dot flashing on the display, indicating that the update has finished.

Following these detailed procedures will ensure that your Amana PTAC unit runs efficiently and smoothly.

Understanding Amana AC Error Codes

If your Amana AC displays an error code, it could indicate various issues, such as communication problems between the indoor and outdoor units, circuit board malfunctions or failures, clogged filters, or a low freon charge. Here are some common Amana AC error codes and their meanings:

  • Code FP: Indicates that the room temperature has dropped to 40°F.
  • Code F2: Indicates a faulty wireless thermostat remote.
  • Code H1: Indicates excessive electric supply.
  • Code Fb: Indicates a low battery life in your unit’s remote.
  • Code LC: Indicates that the outside unit coil is overheating.

Resetting Your Amana Furnace Unit

Quick And Easy Ways In Resetting An Amana Air Conditioner

If your Amana furnace is experiencing ignition problems after multiple failed attempts to start, the furnace control system may trigger and lock out the unit. In such cases, you can reset the furnace unit by following these steps:

  1. Lower the thermostat temperature.
  2. Turn off the furnace unit.
  3. Lift the furnace panel door and pull it toward you to remove it.
  4. Turn the gas valve knob clockwise to switch it off.
  5. Close the external shut-off gas valve.
  6. Securely reinsert the furnace door.
  7. Turn the furnace power supply back on.
  8. Return to your room thermostat and set it as needed.

It is important to note that if the resetting process does not resolve the issue and the problem persists, it is highly recommended to contact your HVAC contractor for professional assistance.

Importance Of Resetting An Amana HVAC Unit

Quick And Easy Ways In Resetting An Amana Air Conditioner

Resetting your Amana HVAC unit is crucial when issues arise as it helps prevent further damage. By promptly resetting the unit, you can minimize the risk of additional problems. Therefore, it is advisable to reset your unit periodically, even if there are no apparent issues.

Fortunately, Amana, like other leading brands in the industry, incorporates built-in safety features in their products. ComfortBridge technology ensures consistent cooling and heating by maintaining a stable indoor temperature. Additionally, the CoreSense Diagnostic system monitors the compressor’s operation and shuts off the system in case of any unusual events.

These safety features help identify potential issues in advance, allowing you to reset the unit before major problems occur.

Locating The Reset Button On An Amana Air Conditioning Unit

Similar to many other air conditioning units, Amana air conditioners are equipped with a reset button. This button is usually small and colored orange-red, clearly labeled as the “RESET BUTTON.”

On an Amana air conditioner unit, the reset button can be found on the exterior compressor unit. If you have trouble locating it, refer to your Amana user manual for precise instructions.

Additional Troubleshooting Methods For An Amana Air Conditioner

Quick And Easy Ways In Resetting An Amana Air Conditioner

While Amana air conditioners are known for their consistent cooling performance, occasional malfunctions can still occur. Before contacting an HVAC professional, it is worth trying some troubleshooting steps to see if you can resolve the issue yourself. Furthermore, providing your HVAC specialist with detailed information about your troubleshooting attempts can help them accurately identify the cause of the problem.

To troubleshoot your Amana air conditioner, consider the following steps:

Check Your Thermostat
Your thermostat plays a crucial role in regulating the operation of your Amana air conditioner. If it malfunctions, it can prevent the unit from running or cooling properly. Ensure that the batteries in your digital thermostat are not depleted, as they may need replacement.

Check Your Circuit Breaker
If your air conditioner is not receiving power, it may be due to a tripped circuit breaker. Check your breaker box to ensure that the circuit breaker powering your HVAC system is in the “ON” position. If it has tripped, switch it back on and wait for a moment to see if your AC unit starts functioning again.

Clean The Outdoor Unit
Obstructions such as shrubs, dirt, or debris around the outdoor unit can hinder proper airflow, causing your Amana air conditioner to operate inefficiently. Inspect the exterior unit and remove any obstructions that may be blocking the airflow.

Replace The Air Filter
The air filter in your Amana HVAC system is an essential component that requires regular replacement. Depending on the model and type of your unit, as well as the frequency of use, you may need to replace the filter monthly, quarterly, or yearly. A dirty or clogged filter can restrict airflow and cause the system to shut down. Inspect the filter regularly and replace it as recommended.

Check The Drain Lines
The drain line in your air conditioner unit is responsible for removing moisture from the indoor unit to the outdoor unit. Over time, this drain line can become clogged with mold and mildew, leading to drainage issues. Some air conditioners have sensors that shut off the unit if the drain becomes clogged. To unclog the condensate drain line, use a wet/dry vacuum hose to remove dirt or debris, or use a garden hose to flush water through the entry point.

Why Is My Amana Air Conditioner Not Turning On?

If your Amana air conditioner is not turning on, there could be a few potential causes. One common issue is a tripped breaker in your electrical box. Check if the breaker has tripped and reset it if necessary. Additionally, inspect the air filters as they can become clogged and restrict airflow, causing the unit to malfunction. Regularly changing the filters can prevent this problem and ensure the proper functioning of your unit.

Conclusion

In conclusion, knowing how to reset your Amana air conditioner unit is essential for maintaining its optimal performance. This article has provided step-by-step instructions for resetting both Amana PTAC units and furnace units. It has also addressed common error codes and troubleshooting methods for Amana air conditioners.

Resetting your unit promptly can help prevent further damage and ensure its efficient operation. Amana’s built-in safety features, such as ComfortBridge technology and CoreSense Diagnostic, contribute to the reliability and longevity of their HVAC systems.

If you encounter any issues with your Amana air conditioner, consider troubleshooting steps such as checking the thermostat, circuit breaker, outdoor unit, air filter, and drain lines. However, if the problem persists or if you are uncertain about performing any maintenance tasks, it is recommended to seek professional assistance from an HVAC contractor.

By following these guidelines and properly maintaining your Amana air conditioner unit, you can enjoy a comfortable and cool home for years to come.

Cleaning A Sharp Air Conditioner: A Guide

To guarantee the effective performance and durability of your Sharp air conditioner, proper maintenance and regular cleaning are vital. We'll provide you professional advice on how to effectively clean your air conditioner in this article. We'll go over how to clean your air conditioner's indoor and outdoor units and offer advice on how to get rid of mold. So let's get started and discover how to properly clean your Sharp air conditioner.

Cleaning A Split-Type Sharp AC

An essential component of your Sharp air conditioner's general maintenance is cleaning. When your air conditioner is clean, it will operate at peak efficiency and give you a smooth, constant flow of cool air in your room. You can avoid problems like ice development on the coils, increased energy use, higher expenditures, and potential respiratory difficulties by cleaning up debris and dust.

To ensure proper cleaning, follow these steps and tips:

1. If the AC has been in use, run it in Fan Mode for at least 30 minutes before starting the cleaning process. This will help remove moisture from the AC.

2. Turn off the air conditioner and unplug it from the power outlet to ensure safety.

3. Attach a garbage or cleaning bag around the unit to collect dirt and dust during the cleaning process, making it easier to clean up afterward.

4. Open the front panel and detach it from the unit to provide better access for cleaning.

5. Wipe off any dirt from the front panel and set it aside.

6. Push the filters upwards to unlock them and then slide them down to remove them.

7. Use a vacuum cleaner to thoroughly clean the filters.

8. Soak the filters in warm soapy water, using mild detergent soap. Gently scrub them if necessary.

9. Rinse the filters thoroughly and wipe them with a clean cloth.

10. Allow the filters to air-dry in a shaded area of your house.

11. While the filters are drying, use a vacuum cleaner to clean the interior of the air conditioning unit.

12. Spray an evaporator cleaner on the coils and let it stand for approximately 20 minutes. Then, wipe off the cleaner from the surface.

13. To sanitize the interior of your AC, use an anti-fungal spray and let it sit for 10 minutes.

14. Once the filters are dry, reinstall them in their proper place.

15. Reattach the front panel to complete the cleaning process.

16. Detach the drain pipe and use a pressurized flush kit to clean its interior, removing any particles that could cause blockage.

17. Reconnect the drain pipe.

18. Finally, turn on your AC for about 20 minutes to flush out any dirty water from the drain.

Congratulations! You have successfully cleaned your AC unit without the need for professional assistance. It is recommended to clean the filters every month, especially during the summer. However, if you have pets or live in an area with heavy dust or pollution, more frequent cleaning may be necessary.

Should You Clean Your Outside Air Conditioning Unit?

In addition to cleaning the indoor unit, it is equally important to clean the outdoor unit of your air conditioner regularly. Since the outdoor unit is exposed to the elements, it is more susceptible to accumulating dirt, which can hinder its performance and efficiency. Follow these steps to clean the outdoor unit:

1. Always start by turning off the power to ensure safety.

2. Gently remove any large leaves or debris that may be trapped in the air outlet or around the unit.

3. Take this opportunity to clear any shrubs or plants that are growing near the unit. Ensure that all sides of the unit are free from obstructions to allow proper airflow.

4. Use a water hose to wash off dirt from the outdoor AC unit. A regular

 water stream is sufficient; avoid using a power washer as it may damage the coils.

5. For stubborn dirt, you can use a foaming coil cleaner. Apply the cleaner and let it sit for 10 minutes to loosen the dirt, then rinse thoroughly with the water hose.

6. Ensure that all sides of the unit are clean by spraying water at different angles to capture hidden dirt and fine particles.

7. Turn the unit back on once the cleaning process is complete.

Unlike the indoor unit, the outdoor unit does not require frequent cleaning. Experts suggest scheduling this task at least once a year. However, it is advisable to periodically check the outdoor unit and remove any dirt or obstructions to maintain its smooth operation.

Can You Use Water to Clean the AC Outdoor Unit?

Yes, you can use water to clean your AC's exterior unit. Avoid using a pressure washer, though, since it can harm the sensitive coils. You may relax knowing that the outdoor unit's electrical components are water-resistant and built to withstand heavy rain or cleaning.

The outdoor unit can be kept clean and more effective by giving it a water wash. It encourages evaporation inside the system, enabling it to cool down more quickly and with less energy use. A cleaner, more effective outside unit typically has a longer lifespan. You can help the appliance work effectively without overworking its parts by making sure it is cleaned properly.

Cleaning A Window Air Conditioner Of Mold
It's critical to handle mold growth in your air conditioner right once since it can cause mold spores to spread and set off allergic reactions and asthma attacks. In addition to causing irritation and breathing problems, mold can harm different surfaces in your house. As a result of moisture absorption and the presence of dark crevices where mold can grow, air conditioning equipment are particularly vulnerable to mold infestation. Mold growth may be facilitated if your air conditioner has been idle for a while and there is still water present.

To inspect and address mold growth in your air conditioner, follow these steps:

1. Turn off the unit and equip yourself with protective gear, such as a face mask, goggles, and gloves.

2. Remove the front panel and filters to gain access to the affected areas.

3. Assess the extent of the mold growth using a flashlight. Look for fuzzy or cottony appearances and green, brown, or black stains on the surfaces.

4. If more than one-third of your unit is affected by mold growth, it is recommended to replace the unit. However, if the infestation is limited, and you feel confident in managing the cleaning process, you can proceed.

To remove mold from your AC, follow these steps:

1. Remove the unit from the window or wall with the assistance of another person, as it can be heavy.

2. Place the AC unit on a flat surface.

3. Open the front panel and remove the filters.

4. In a tub of warm soapy water, add 1/2 cup of bleach.

5. Soak the filters in the bleach solution.

6. Remove the top and back portions of the AC's casing, referring to the owner's manual for disassembly instructions if needed.

7. Attach the nozzle to a vacuum cleaner to thoroughly clean the interior of the AC unit.

8. Apply a commercial cleaner to the coils.

9. Rinse the coils and remove the coil cleaner and debris using a garden hose.

10. Prepare a bucket of hot water and bleach, using up to a cup of bleach per gallon of water according to CDC guidelines.

11. Soak a sponge in the bleach solution and use it to wipe the interior surfaces of the AC unit, especially areas with visible mold. Take caution and wear protective gloves while working with bleach.

12. Rinse all components, including the filters,

 with clean water.

13. Allow the unit to air-dry before reinstalling the filters.

14. Reinstall the AC unit in the window or wall.

Regular cleaning and maintenance of your AC unit, maintaining ideal humidity levels in the room, and running the AC frequently can help prevent mold growth.

Final Thoughts

Cleaning your Sharp air conditioner is a relatively simple task as long as you have the necessary tools and follow the proper steps. Regular cleaning ensures that you can enjoy clean and cool air from your cooling system. By adhering to the recommended cleaning frequency and following the instructions provided, you can maintain the efficiency and lifespan of your Sharp air conditioner.
Write to Chester Amion

What do you think?

Written by HVAC Contributor

Leave a Reply

Your email address will not be published. Required fields are marked *

GIPHY App Key not set. Please check settings

Sharp Vs Carrier Air Conditioner: Which Is Better?

Air Conditioners Vs Air Handlers: What You Need To Know

The Best Way To Clean A Sharp Air Conditioner

The Best Way To Clean A Sharp Air Conditioner