
When it comes to addressing radon issues in your home, a do-it-yourself (DIY) radon mitigation system may initially seem like a cost-effective solution. However, without proper knowledge and expertise, many people make significant mistakes during the installation process, potentially exacerbating the problem or even raising radon levels in their homes. In this article, we will explore the common DIY radon mitigation mistakes to avoid, providing you with valuable insights to ensure your safety and the effectiveness of your mitigation efforts.
Understanding Radon
Radon is a radioactive gas classified as a Class A carcinogen by health authorities. It poses a serious health risk when present in high concentrations in indoor spaces. If your radon levels measure at or above 4 picocuries per liter (pCi/L), it’s crucial to install a radon mitigation system to safeguard your home’s occupants.
DIY Radon Mitigation Mistakes To Avoid

- Using Insubstantial Materials for Radon Vent Pipe
The Environmental Protection Agency (EPA) standards for radon mitigation require the use of Schedule 40 polyvinyl chloride (PVC) pipes. These pipes are rigid and durable, unlike flimsy materials such as plastic flex vents or Schedule 20 PVC pipes. Utilizing subpar materials increases the risk of punctures, tears, or loose connections, potentially allowing high concentrations of radon gas to enter your home.
- Installing Radon Vent Pipe Horizontally
Installing the radon vent pipe horizontally can create a water trap, impeding the proper functioning of the system. Radon fans can extract significant amounts of water from the soil daily, necessitating proper drainage to prevent obstructions that reduce system efficiency over time.
- Installing Radon Vent Pipe Too Close to a Window
EPA regulations mandate that the radon vent pipe must be positioned at least 10 feet away from windows or other access points to living areas. This distance is crucial to prevent radon from re-entering your home and exacerbating existing radon levels.
- Allowing the Radon Vent Pipe to End Underneath a Window
To effectively redirect radon gas away from potential exposure, ensure that the radon vent pipe does not terminate too low, where it could vent radon back into your home.
- Neglecting Firewalls and Fire Collars
To comply with fire codes in most states, it is essential to incorporate firewalls between the PVC pipe and your building and install fire collars at points where the pipe enters or exits the structure. These measures help prevent the spread of fire caused by the easily combustible PVC material.
- Installing a Rain Cap on the Radon Vent Pipe
Installing a rain cap on the radon vent pipe can obstruct airflow and direct gases downward, violating EPA regulations. Radon pipes typically have strong airflow that prevents water intrusion. If concerned about rainwater, consider installing the vent pipe horizontally and away from the house, a permissible alternative that keeps water out.
- Placing the Radon Mitigation Fan Below Living Spaces
The EPA strongly discourages installing radon mitigation fans in basements or crawl spaces. Although it may seem logical to place the fan there to keep it out of sight and away from potential corrosive elements, this approach can pose a risk. Radon fans generate strong suction, and any pipe cracks can allow radon to enter your home. Moreover, failing to comply with EPA guidelines can lead to inspection failures when selling your home.
To ensure effective radon mitigation, install the fan outside, in the attic, or in the garage, placing it as far from the basement as possible to prevent radon infiltration.
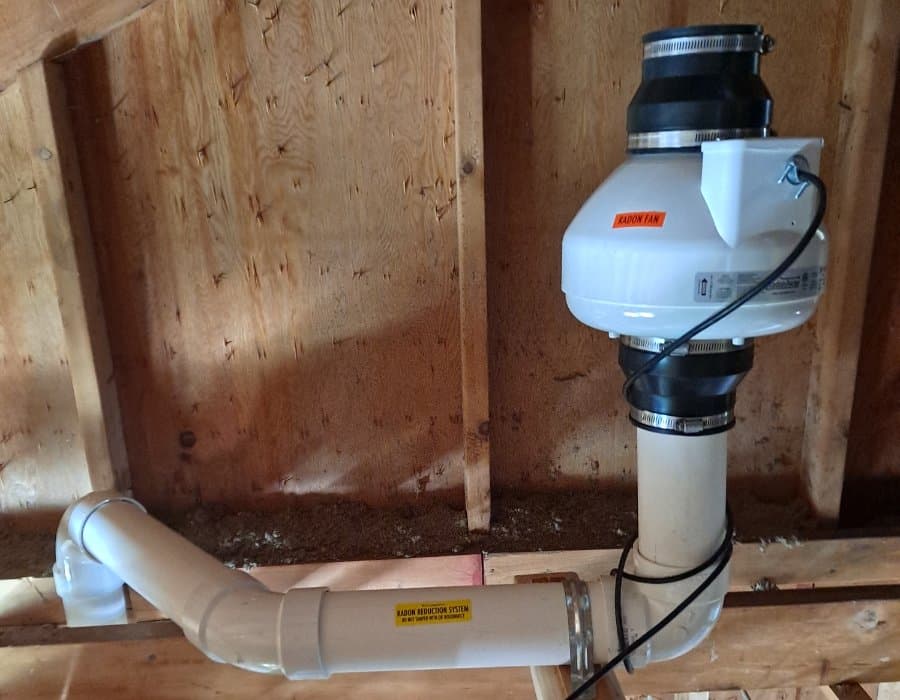
- Installing Radon Fan Horizontally or at an Angle
Attempting to install the radon fan on a horizontal pipe or at an angle can result in water accumulation within the fan. Fan bearings are not designed for such positions, leading to premature failure and decreased system efficiency. Most manufacturers recommend mounting the radon fan vertically to prevent these issues.
- Improperly Sealing the Radon Mitigation System
Proper sealing of the radon mitigation system is crucial to prevent leaks and ensure optimal fan performance. Using rubber couplings with high strength to join the fan to the pipes is recommended. Avoid the mistake of gluing these connections, as the glue may deteriorate over time, causing leaks. Additionally, ensure a tight seal around the suction pit and any other potential entry points for radon gas.
How To Install A Radon Mitigation System
If your home’s radon levels exceed 4 pCi/L and you decide to install a radon mitigation system yourself, follow these steps:

- Drill a Hole in the Basement Slab: Use a rotary hammer to create a hole deep enough to accommodate a 3” plastic pipe in the basement slab. Employ a concrete core drill rig to manage concrete dust.
- Excavate Beneath the Slab: Dig a shallow pit beneath the slab using a drill-powered auger. The size of the pit depends on the soil type beneath. For granular soil like gravel, a small pit suffices, while denser soil requires a larger pit.
- Establish a Pipe from the Cellar to the Attic: Route a 3” PVC pipe through your house into the attic. Assemble connections with glue, support the pipe as needed, and ensure that horizontal runs slope for moisture drainage.
- Position the Pipe and Seal: Insert the bottom pipe piece into the sub-slab pit, and use hydraulic cement to seal the junction after placing backer rod between the pipe’s exterior and the slab.
- Place the Radon Fan: Connect the pipe in the attic to a continuous in-line fan, potentially requiring the addition of an outlet for the fan. Proper insulation around the pipe reduces moisture in unheated attics, and the pipe should exit the attic through the roof with appropriate flashing.
- Attach a Manometer to the Pipe: Install a manometer in the basement pipe to monitor system performance while the fan is running.
- Test the Output System: Drill small holes strategically in the basement to test suction. Smoke produced by a smoke pencil will demonstrate the system’s efficiency. After testing, seal the holes with hydraulic cement.
Conclusion
While DIY radon mitigation may appear cost-effective, it can lead to costly mistakes if not done correctly. Avoid the common errors listed above to ensure the safety and effectiveness of your radon mitigation system. However, for the utmost confidence in addressing radon issues in your home, it is advisable to consult with a radon removal expert who can provide the expertise and experience needed to protect your health and well-being effectively.


GIPHY App Key not set. Please check settings